

Standalone Touch ID (Part 1)
There have been a few postings online about this topic, but far fewer than I would have expected by now, so I wanted to give it a try in the hope of helping to add to collective knowledge. There are several critical steps to the process, and I will lay them out below. Keep in mind this first post is just going to cover the extraction of the Touch ID sensor and related components. I will work on a follow-up post about how I chose to house the components.
DISCLAIMER: You may very well ruin a perfectly good Magic Keyboard. Although it all worked for me, that doesn’t mean it will work for anyone else. Be very careful, and go slowwwww!
IMPORTANT! It’s advisable to read through the entire process before diving in. Better to change your mind before you start rather than halfway through an irreversible process. 😱
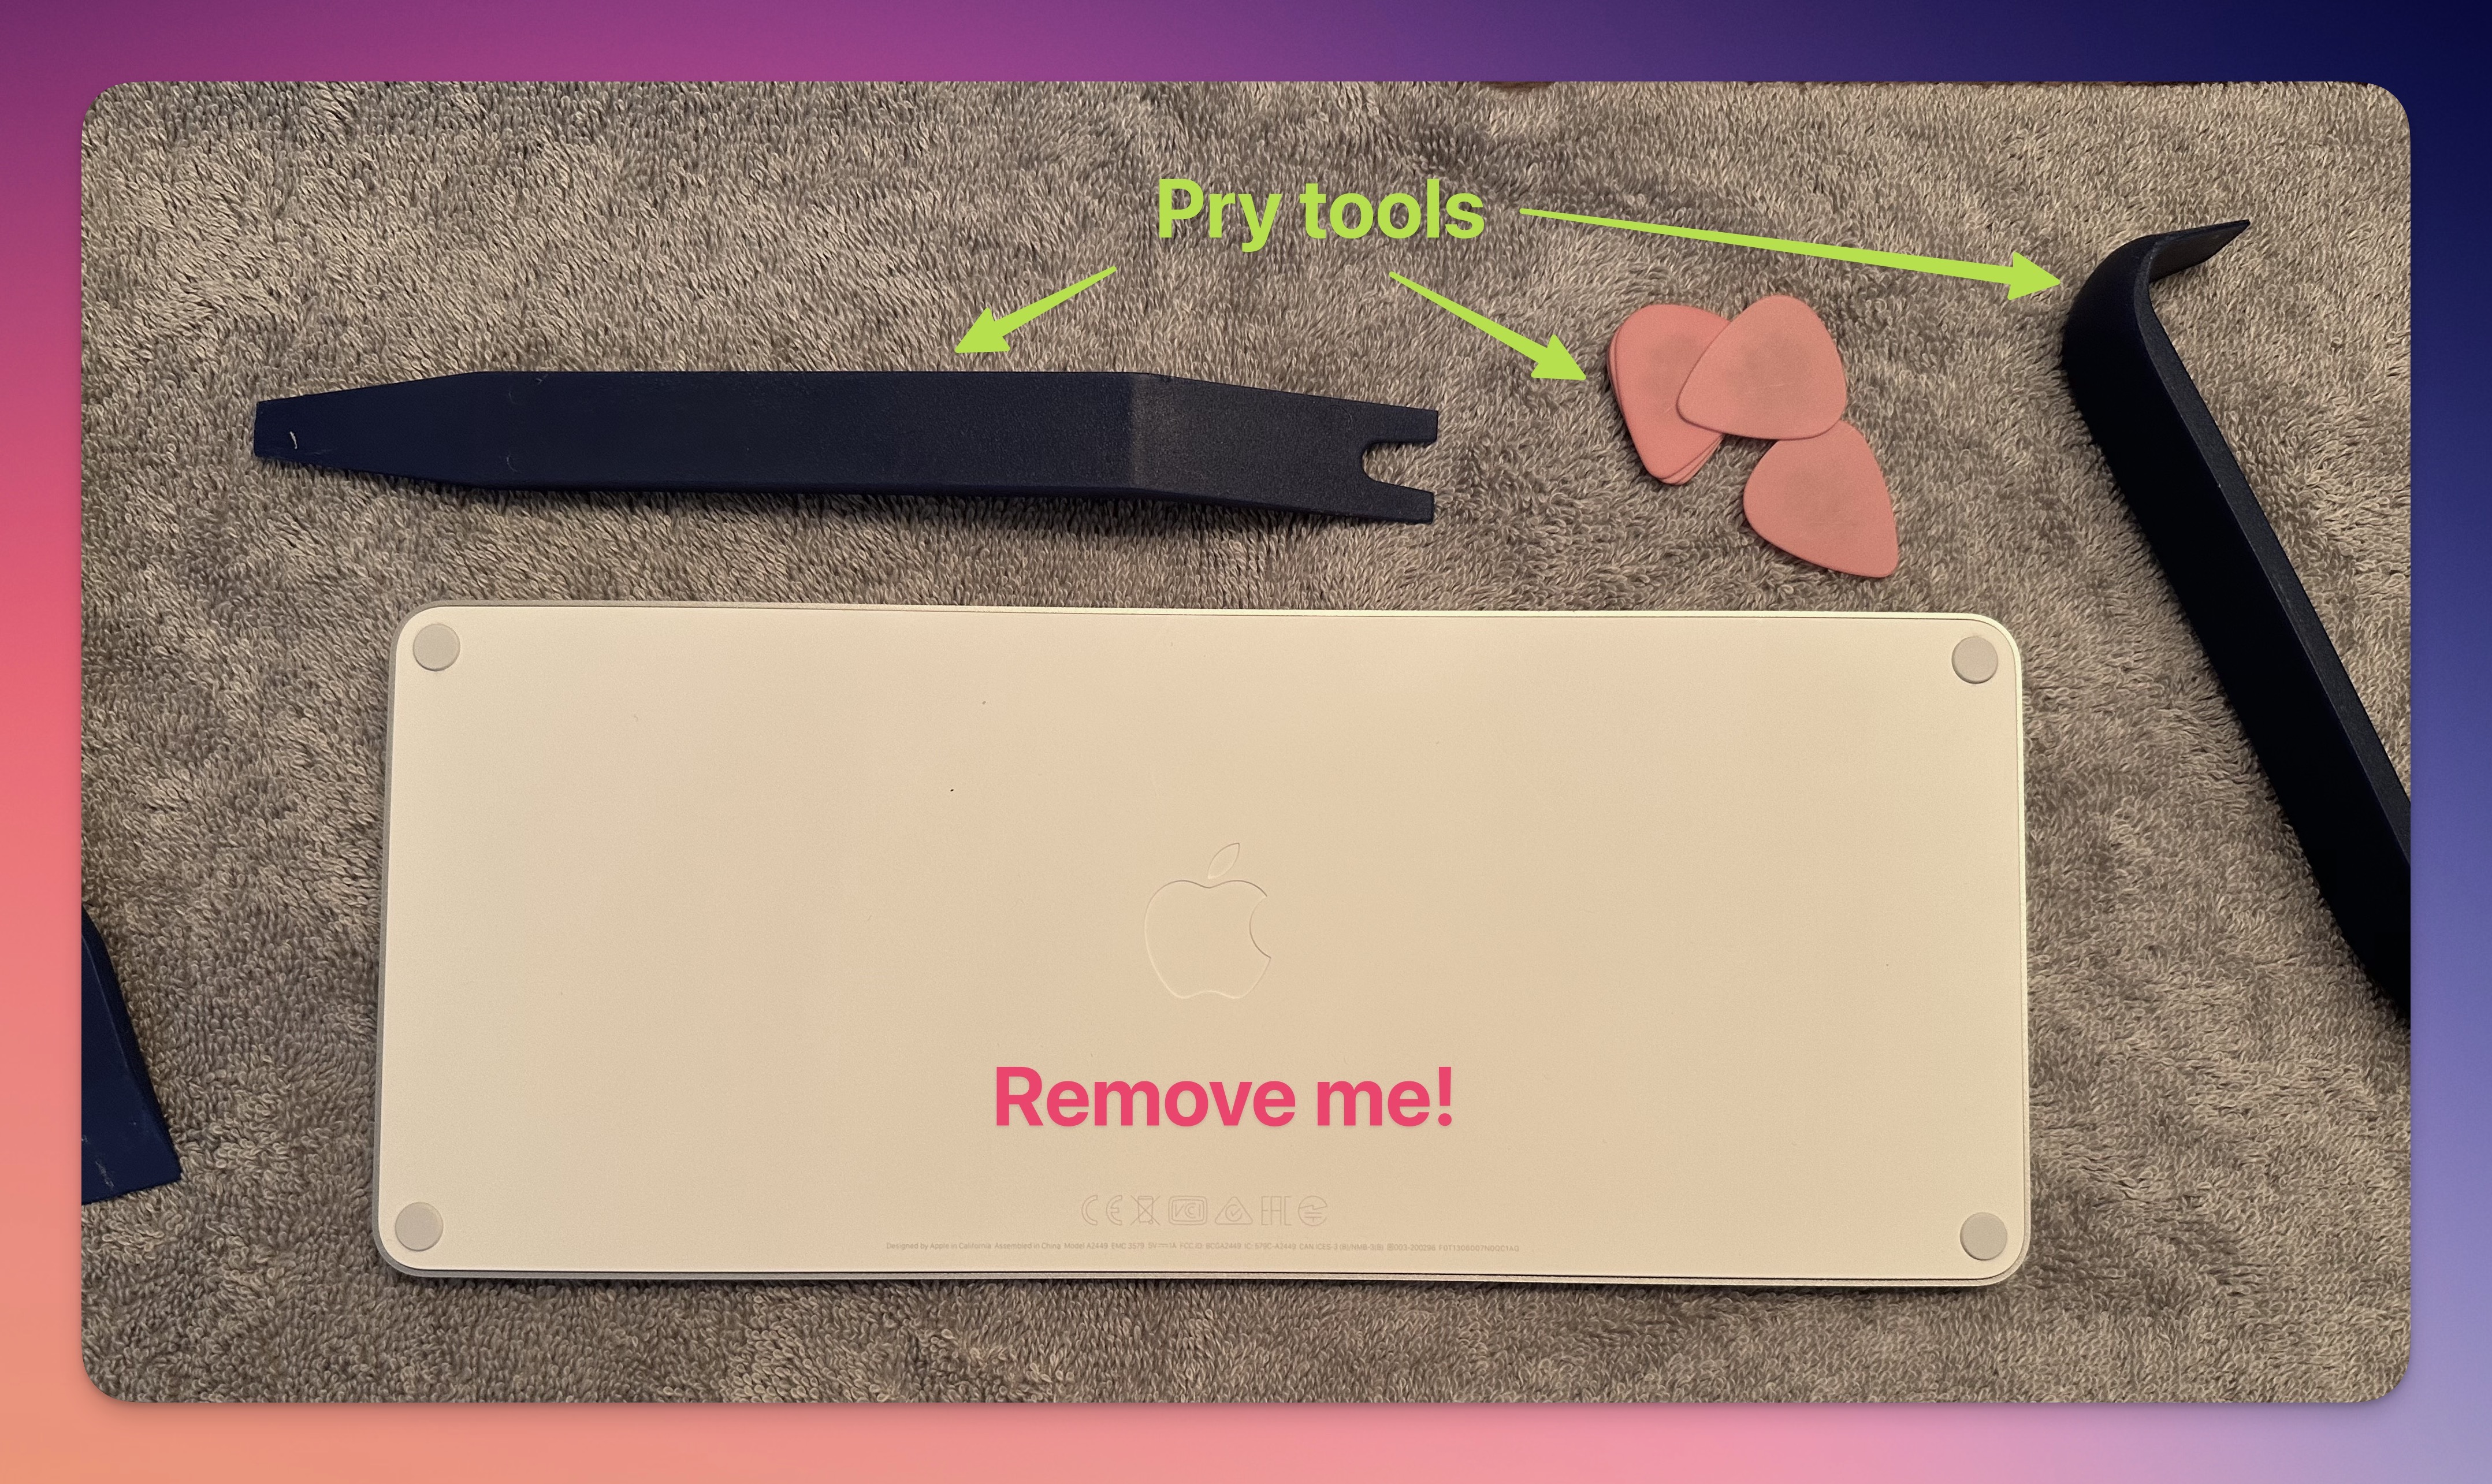
Step 1: Pulling the back off (BE CAREFUL!)
This is the first step and arguably the most concerning. The bottom (white plastic panel) is attached to the inner guts via sticky tape. The best bet for removing this is to warm the keyboard, so the adhesive loosens, and you can peel the plastic layer off, separating it from the rest of the components.
The recipe I used was fairly standard hair dryer + ample patience. Give it time, and then give it more time! As much as you feel like you can just rip it off, you don’t want to rush this first step. As the adhesive begins to warm up and loosen, you can use a few plastic guitar picks or other plastic pry tools to slowly remove the back cover.
IMPORTANT! As you begin to pry and peel, make sure you are only peeling and prying the white plastic and NOT the black plastic that is underneath. That will be removed in the next step via screws, so leave that attached.
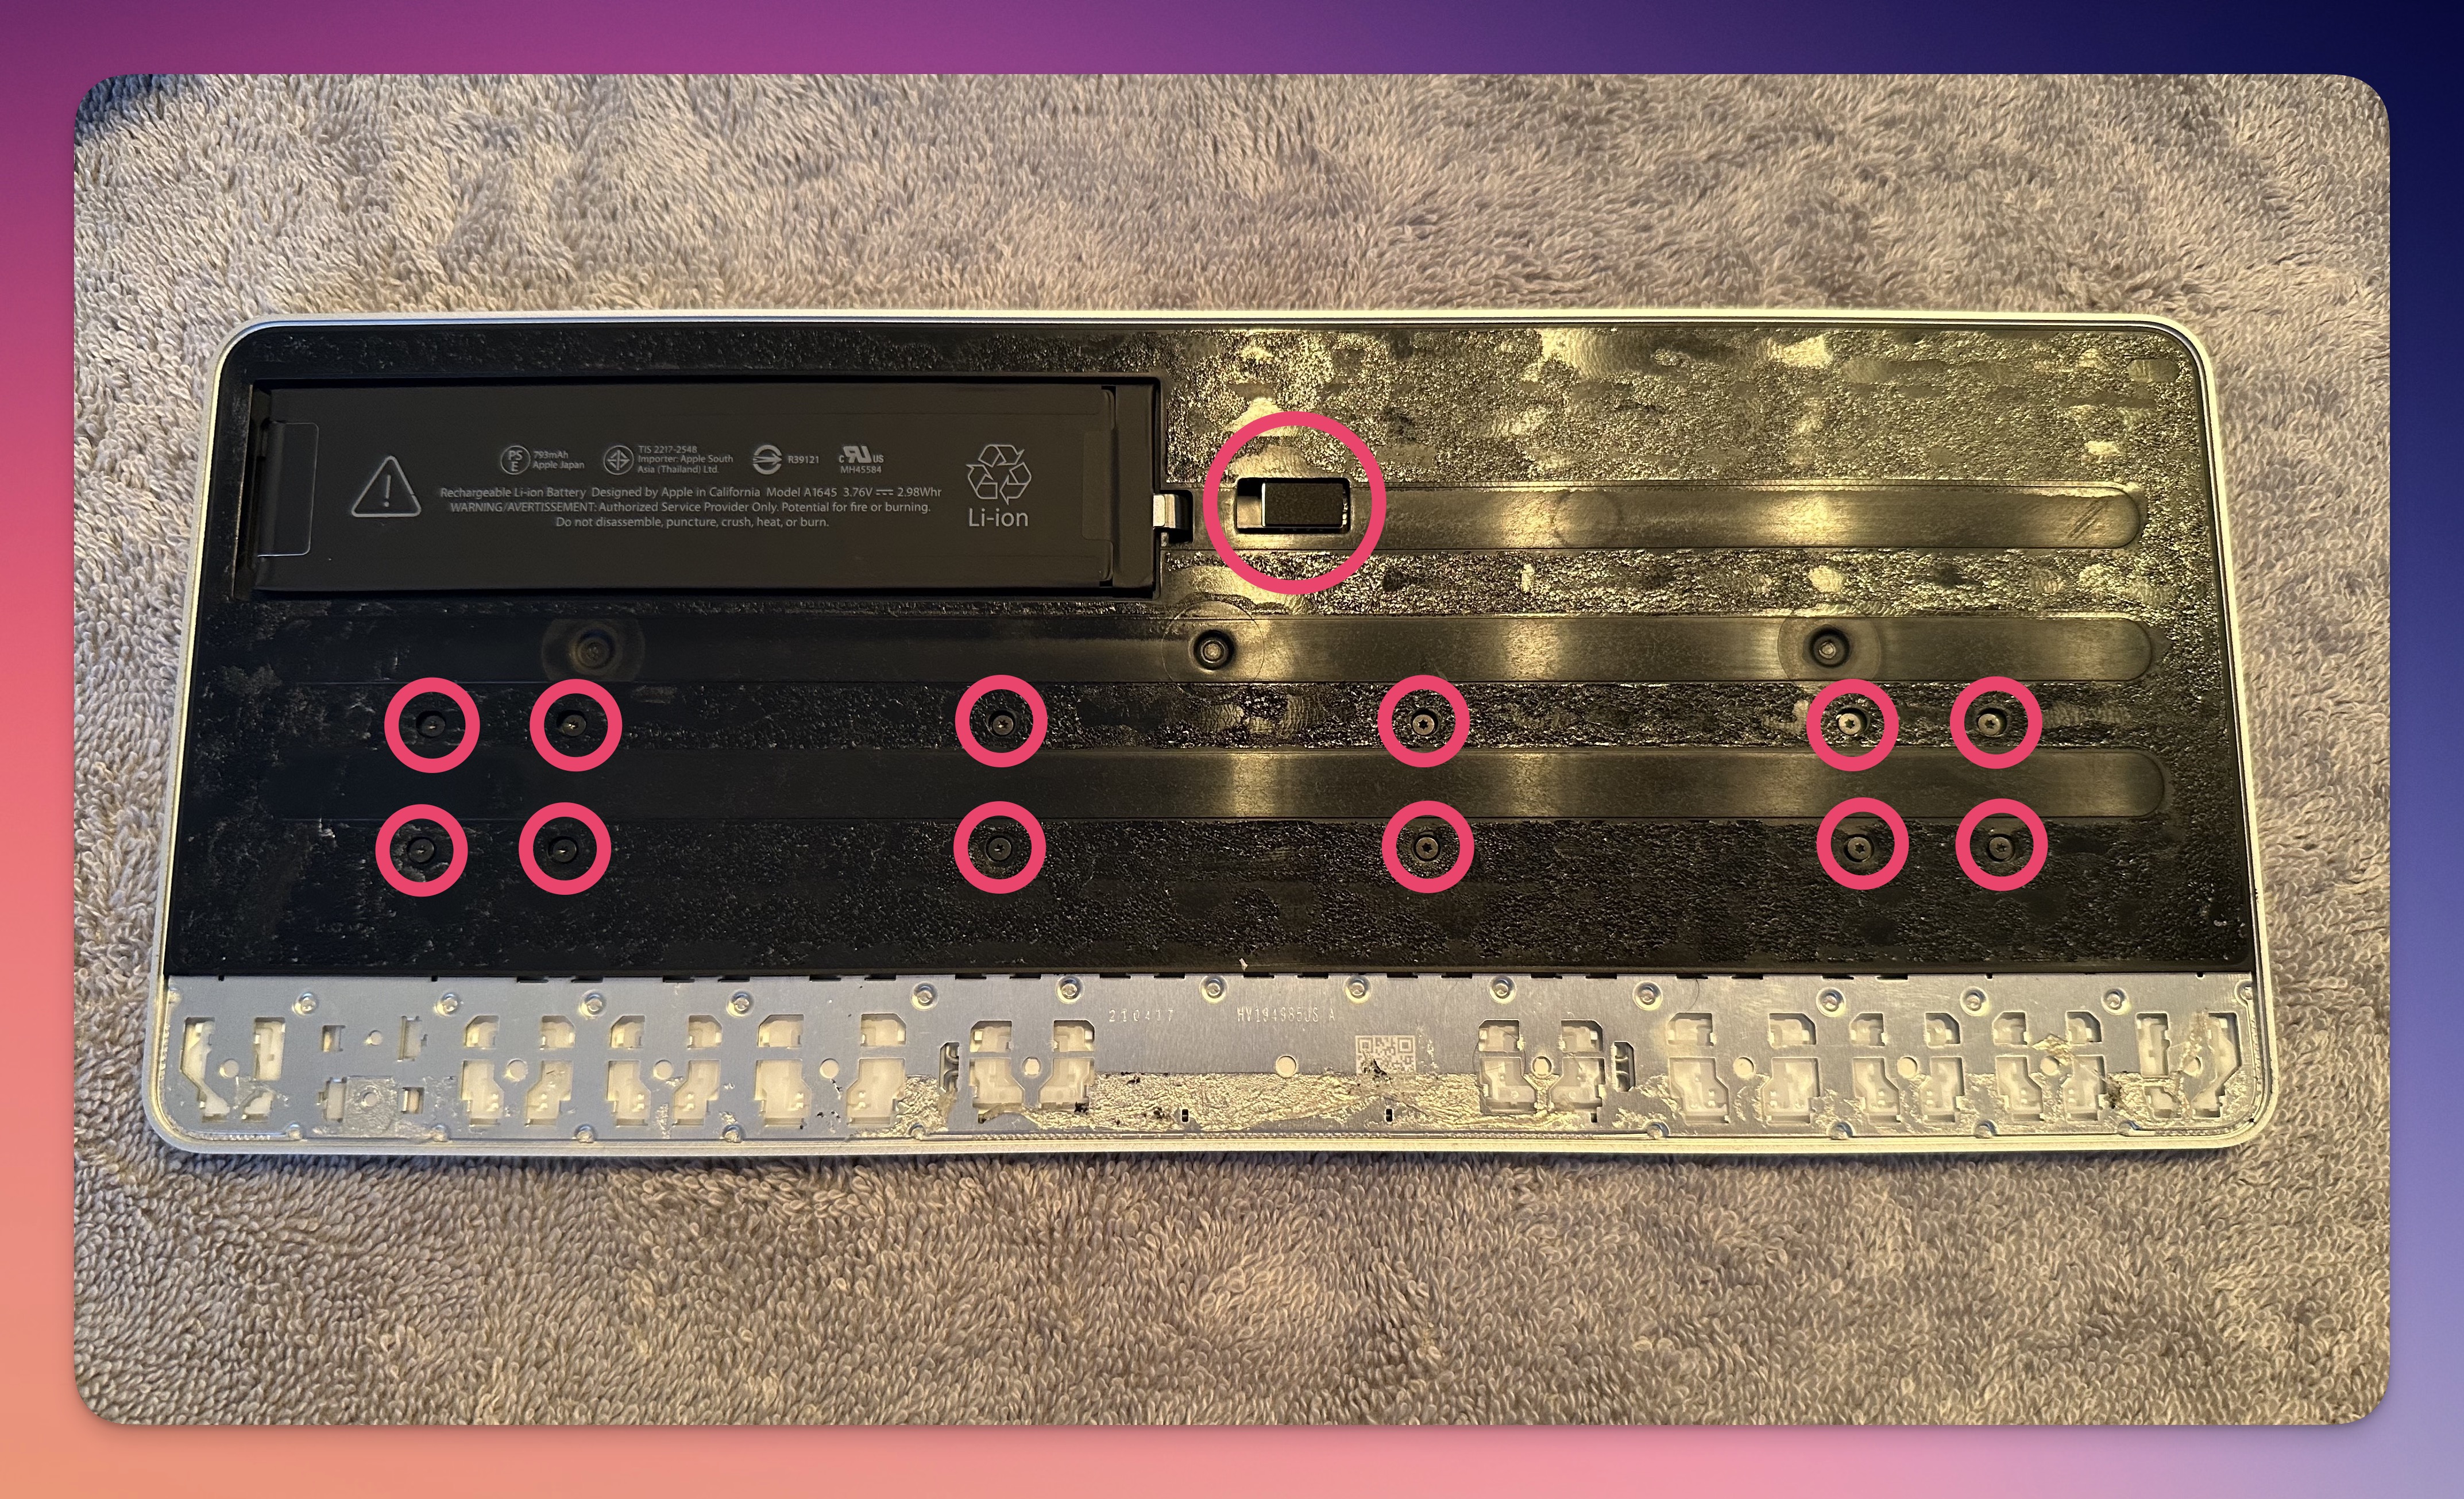
After the back cover is removed, it should look like the photo in the next step. 👍️
Step 2: Removing the second layer
This step is pretty straightforward and less agonizing than the first. First, pop off the little LEGO connector for the battery. Then proceed to remove the tiny little screws so you can remove the black plastic panel. You can remove the battery from the plastic panel by using the pull-strip adhesive. Don’t go prying on the battery. The adhesive is strong, and the battery is very thin and fragile. Unless you are going to be trying to make a wireless version of this (I am not), you really don’t need to remove the battery from this plastic shell at all. You should now see all the components! Time for step 3!
IMPORTANT! Please be SUPER careful with batteries!
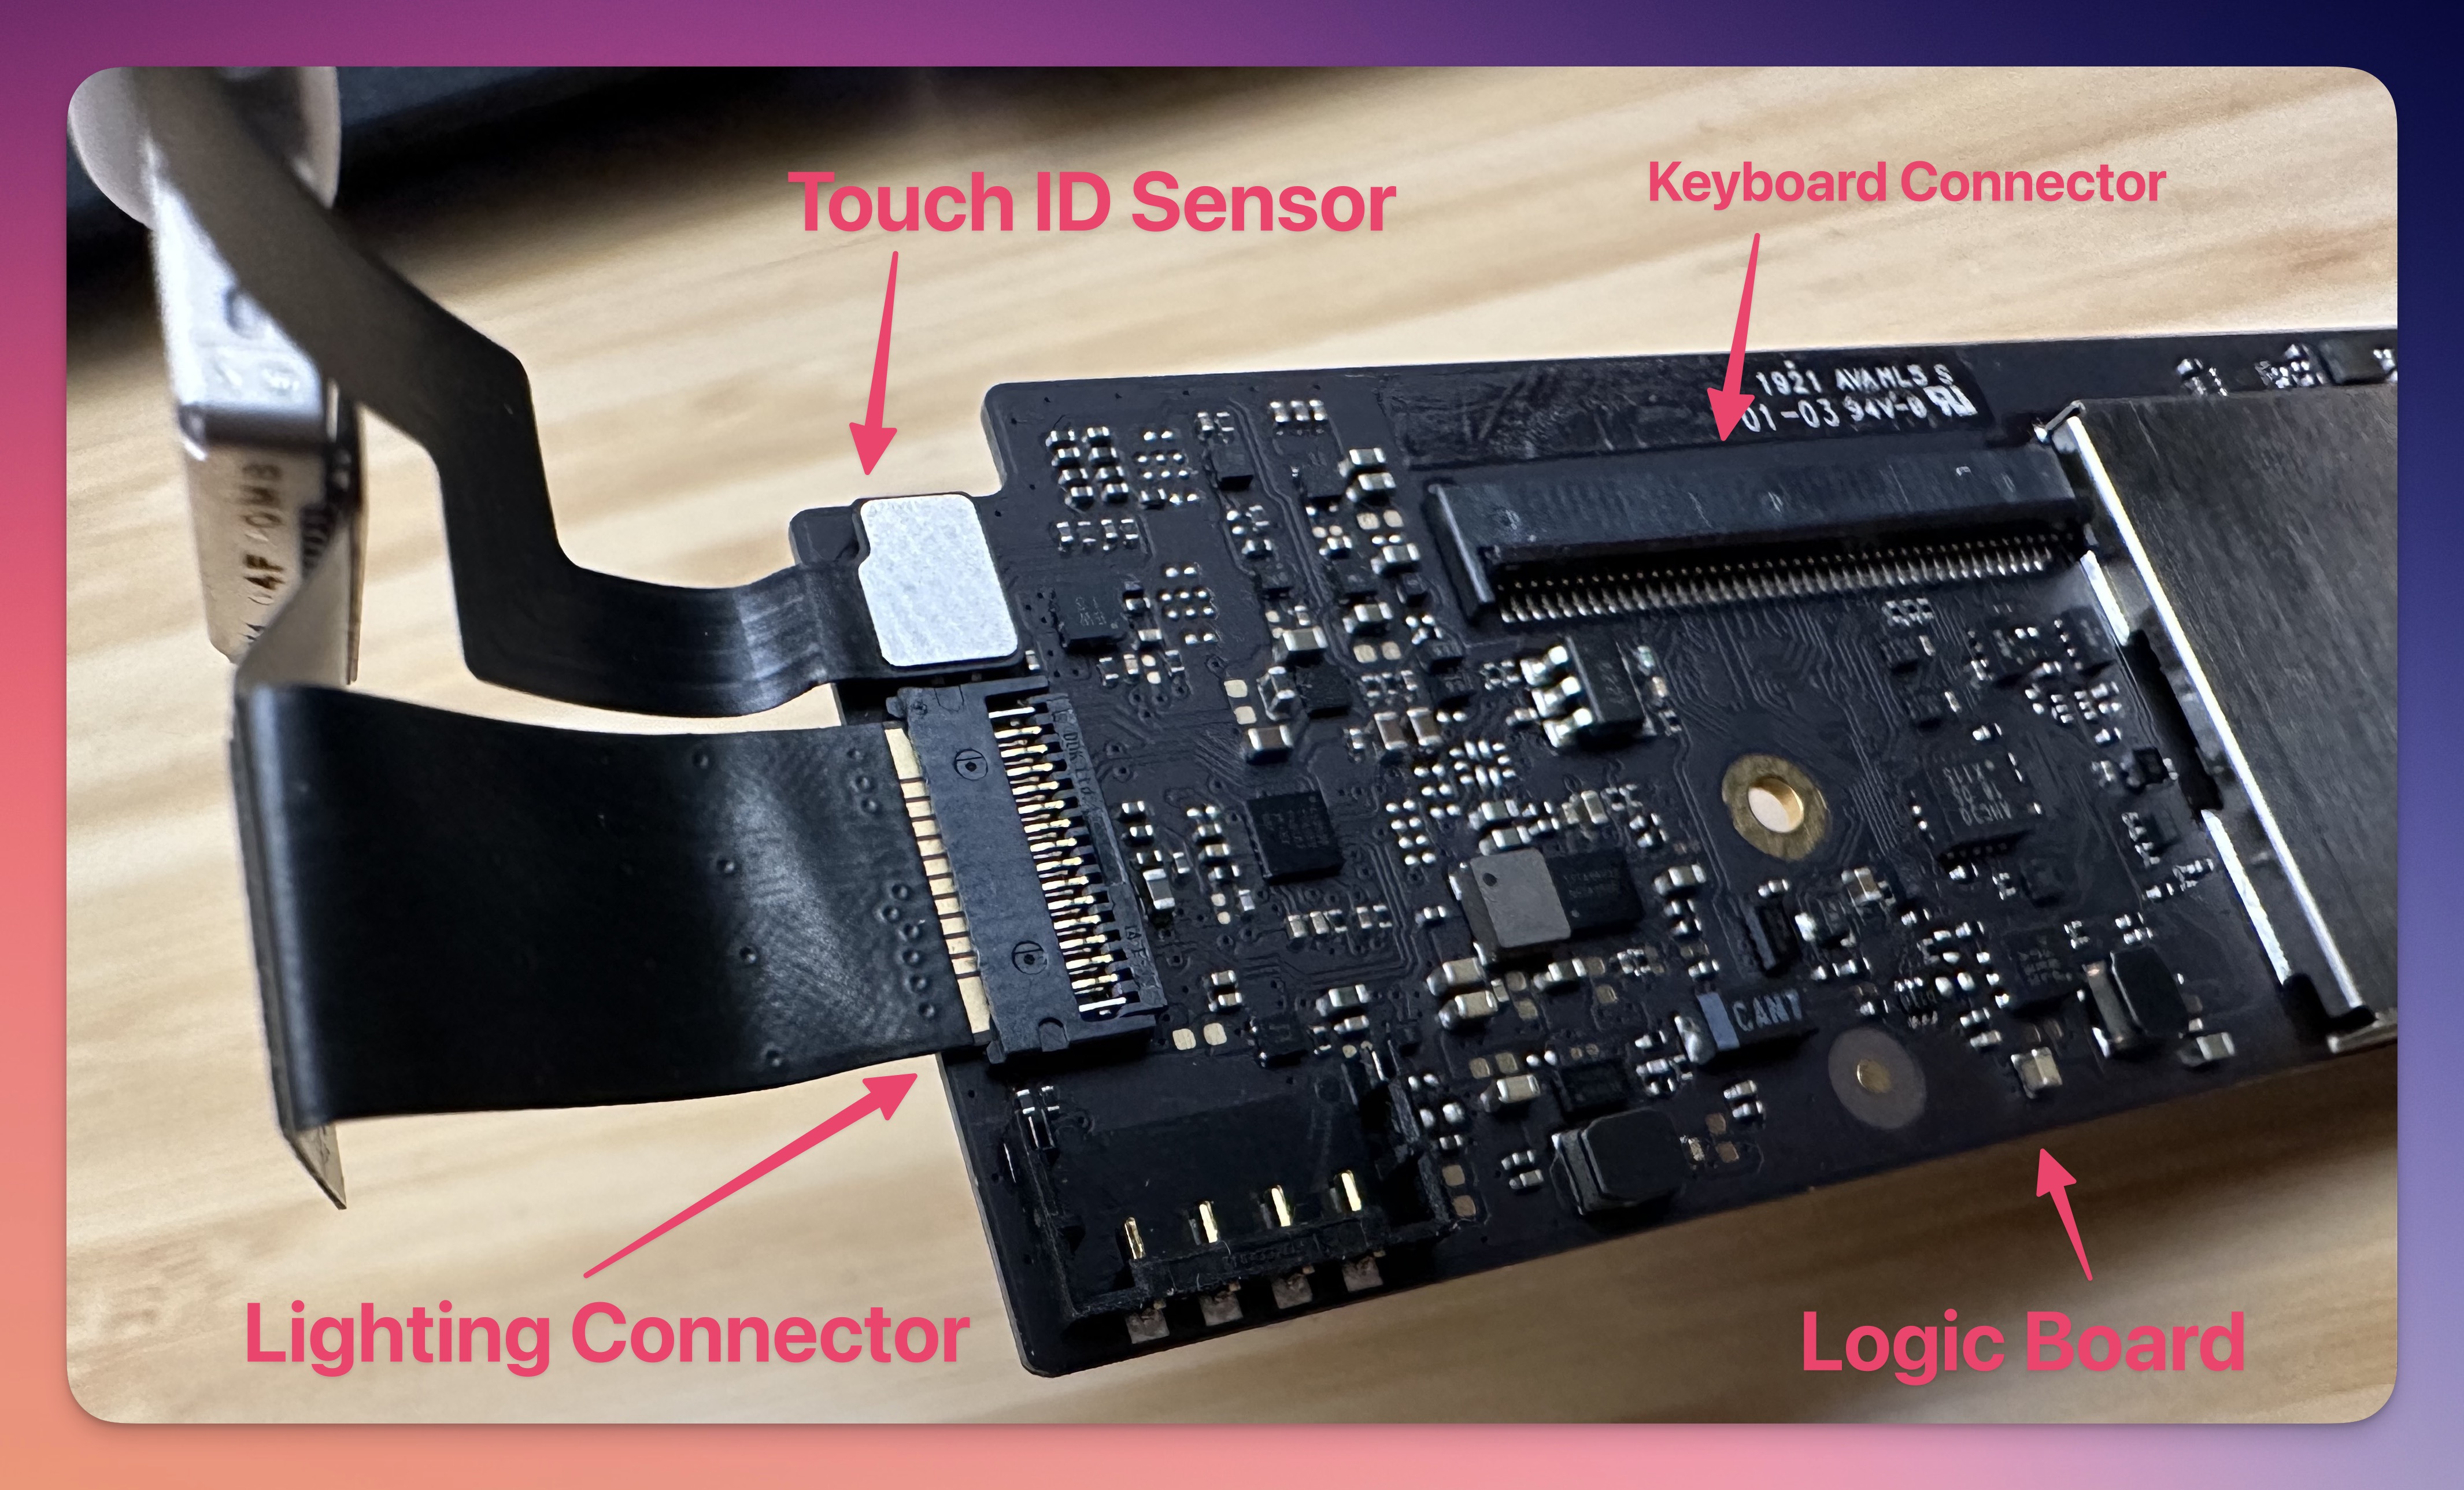
Step 3: Removing the fragile cabling and connectors
Ok, back to being super careful! It’s time to remove the goodies. You can start by removing the screws that mount the logic board, so it’s a little more mobile when unplugging other connectors. The keyboard connector can go first. It’s the largest and gives you more wiggle room for the rest. You don’t necessarily have to disconnect everything, but I found that it made it a bit easier to extract everything.
The only three components that are actually needed
- Logic Board
- Touch ID Sensor + Cable
- Lightning Connector + Cable
Go slowly, and take your time disconnecting and removing the fragile ribbon cables. They are attached to the housing, but not with the insanely strong adhesive from step one, and it peels off pretty nicely. There are two screws mounting the Lightning connector to the keyboard housing as well as a few more screws holding the Touch ID sensor to the main housing. Once those are removed, you should be able to extract all the components.
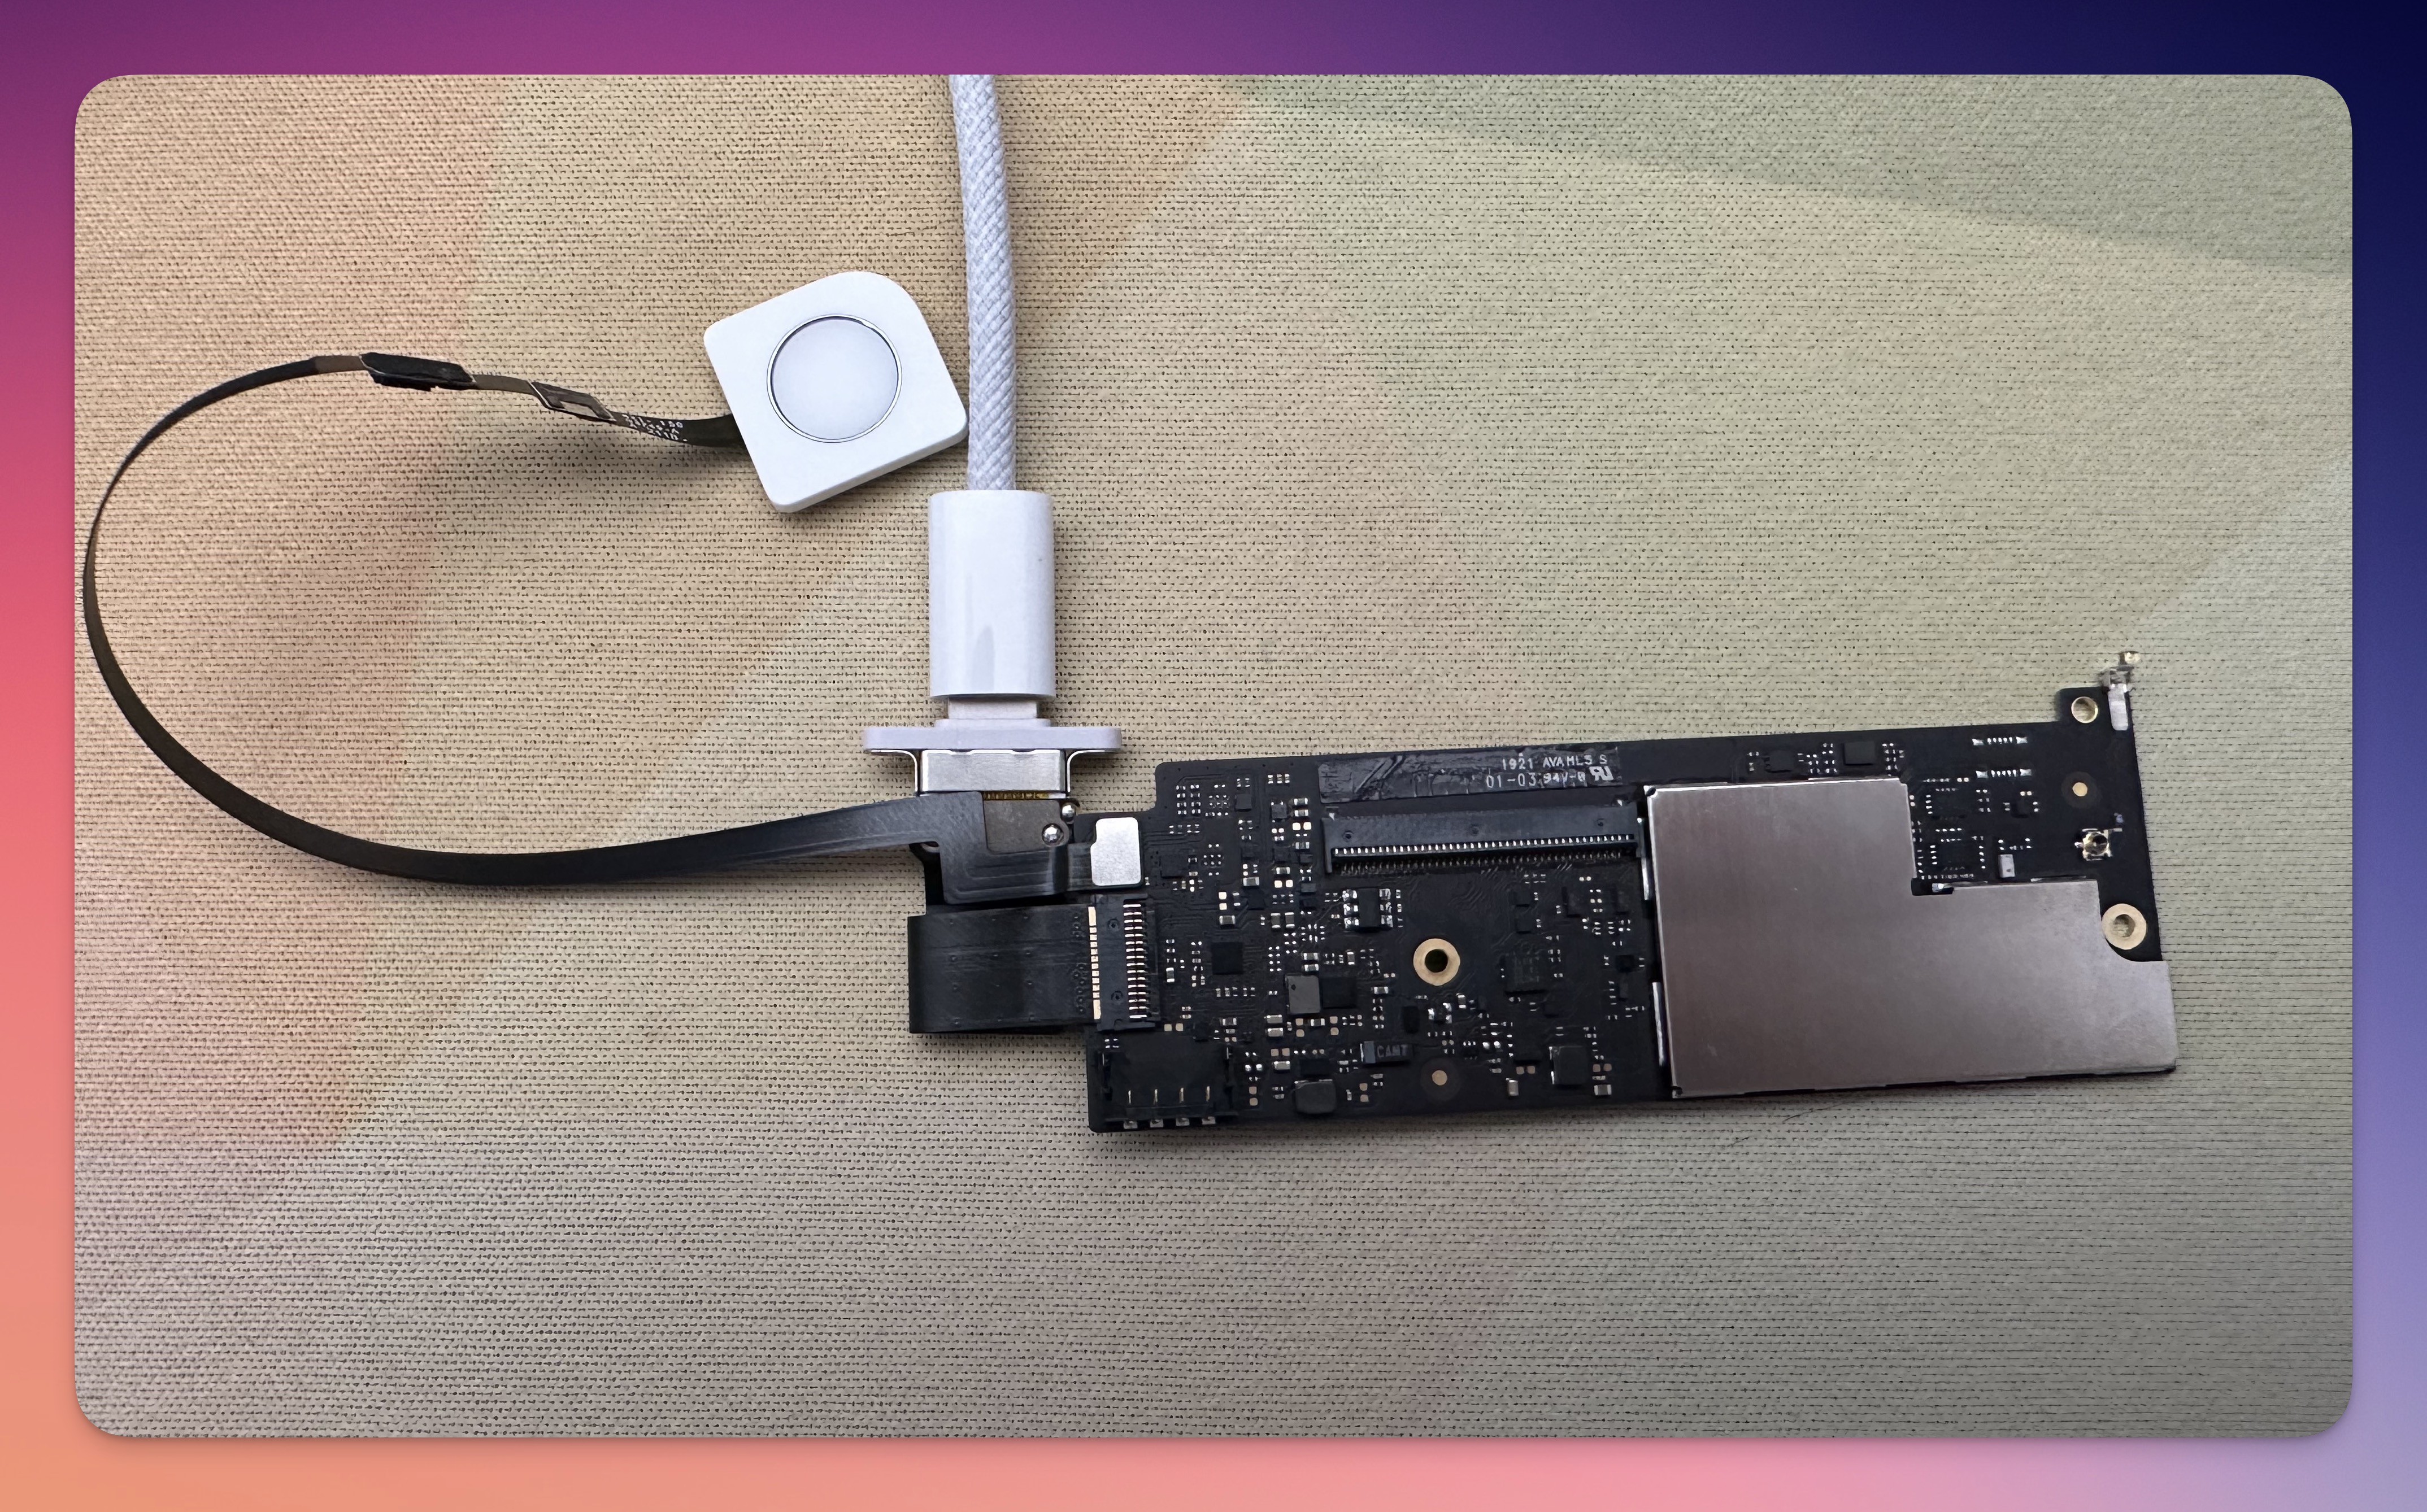
Time to test it out!
You should now have something that resembles the picture below. After plugging it in, you will likely need to register a fingerprint again (I did, anyway). After registering the fingerprint, if everything went according to plan, you now have a standalone Touch ID sensor! 🎉
If you were crazy enough to try this out, I would love to know how it went. Did I miss anything in the post that would be helpful to others?
Enjoy your new keyboardless Touch ID button. 😃
Be sure to check out the Part 2 post!